

We’ve reviewed more than 400 power rack attachments over the years and tested a good chunk of them in my own gym.
I’m Steve Hoyles. I’ve coached lifters and owned a gym for over two decades, and I’ve been buying, breaking and writing about rack gear for most of it. This guide is the shortlist: one scored pick in every category, plus the compatibility catch that trips most people up.
Attachments are the difference between a rack and a whole gym built around one footprint.
Here’s the category-by-category rundown…
Editor's note · updated June 23, 2026
We rebuilt this guide for 2026 into our standard card format: a scored pick in every category, the way every other best-of on the site is laid out.
What changed:
- Every category now gets a proper product card. A pick, an image, quick specs, an honest 0-100 score across compatibility, build, versatility and value, and a Read-more for the deeper story. No more wall of text per category.
- A summary table up top ties each pick to its overall score. These attachments aren’t comparable to each other, so there’s no single “winner”, just the best in each slot.
- Safeties stay split into three sub-picks (pin and pipe, box tube, straps), because that’s the real decision, not “best safety”. The muddled three-types diagram is gone, replaced with a clean comparison.
- Added the Rogue Multi-Use Rack Roller as a leg-roller upgrade for Rogue-rack owners. It’s Rogue-rack-only, so it sits in the also-rans rather than as the category default.
Related
Already settled on J-cups and want the full rundown? See our best J-hooks for a squat rack. Not sure a part will fit your rack? Our power rack attachments compatibility guide lets you filter by profile and hole size.
Compare the best power rack attachments
Pick your category, see the recommended part, what it’s best at, its overall score, and roughly where it sits on price ($ budget, $$ mid, $$$ premium). Compatibility is the catch on every one, so check your rack profile before you buy.
| Category | Our pick | Best for | Overall | Price tier |
|---|---|---|---|---|
| J-cups | Get RXd Builder J-Cups | Value | 90 | \$\$ |
| Spotter arms | REP Spotter Arms | Safety | 89 | \$\$ |
| Safety · pin & pipe | Titan T-3 Pin & Pipe | Budget | 84 | \$ |
| Safety · box tube | Force USA MyRack Tubes | Protection | 87 | \$\$ |
| Safety · straps | PRx Build Limitless Straps | Full depth | 86 | \$\$ |
| Plate storage | REP Weight Horns | Stability | 88 | \$ |
| Bar storage | Rogue Vertical Bar Hanger | Tidiness | 85 | \$\$ |
| Cable / pulley | PRx Elite Pulley System | Versatility | 88 | \$\$ |
| Dip station | PRx Profile PRO | Stability | 89 | \$\$ |
| Lever / jammer arms | Bells of Steel Lever Arms | Variety | 86 | \$\$ |
| Monolift | Titan T-3 Monolift | Solo benching | 83 | \$\$\$ |
| Landmine | Rogue Landmines | Movement range | 87 | \$ |
| Leg roller | Rogue Monster Lite Leg Roller | Leg work | 83 | \$\$ |
Our testing and selection process
How we choose rack attachments
We run every attachment roundup through the same steps:
- We start as the buyer. Most of our team trains on a power rack at home, so we know which attachments earn their footprint and which gather dust.
- We research wide. We pull specs, profile fit, hardware sizes, capacity and owner feedback on as many parts as we can find, 400-plus over the years, into one spreadsheet.
- We score each pick on our four weighted factors. Data decides the pick, not brand loyalty.
- We split the field by job, because a dip station and a landmine are bought for completely different reasons and can’t be ranked against each other.
- We get hands-on where we can and lean on the SHG community for the rest.
You can read more in our review guidelines.
How we score rack attachments
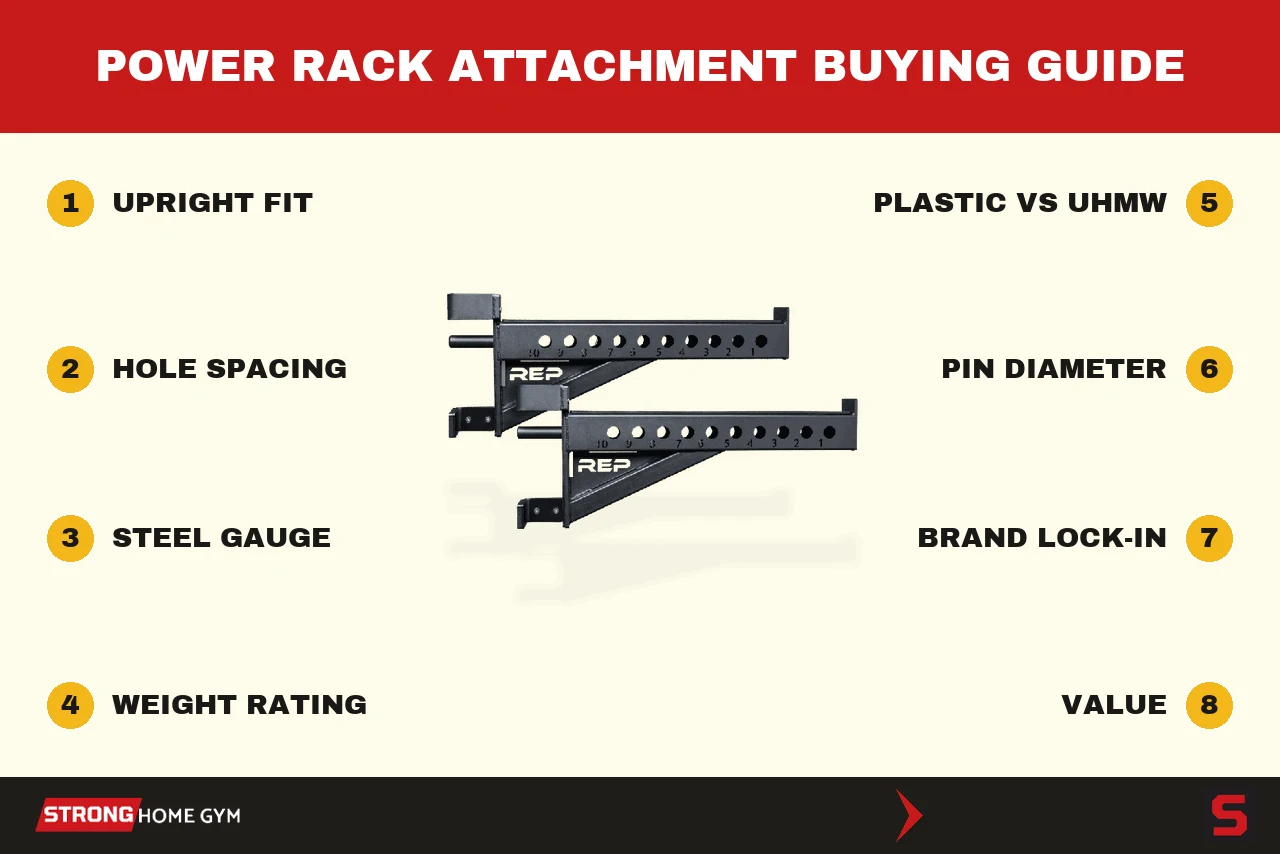
There’s no single best attachment, only the best one for your rack, your goals and your budget. Four things decide every pick below.
We grouped it into four weighted factors:
- Compatibility (25%) - how widely it fits across rack profiles, hole sizes and brands.
- Build quality (30%) - steel gauge, welds, tolerances, lining, and how it holds up under load.
- Versatility (20%) - how many exercises or jobs the attachment unlocks.
- Value (25%) - quality-adjusted: what you get for what you pay.
Compatibility (25%)
Get excited about a part, order it, then find it won’t mount. That’s the most common mistake we see, and it’s avoidable. Three measurements have to match: the upright profile, the hole size, and the hole spacing.
Match all three and a part from one brand happily sits on another brand’s rack. Rigid safeties are the fussiest, since they pass through two uprights, so the inside width matters as well.
Build quality (30%)
This carries the most weight, because it’s what separates a part you love in year three from one that rattles by month two. We look at steel gauge, weld quality, tolerances (how close the real part is to the spec sheet), and the extras like UHMW lining and padding that protect your bar.
Spend on the gear you load heavily and touch every session: J-cups, safeties, a dip station. On a simple part like a landmine, a budget unit does the same job as a premium one, so save there.
Versatility (20%)
The best-value attachments do more than one thing. A pulley system adds a dozen exercises. A landmine adds presses, rows, rotations and squats. Those earn their place faster than a single-purpose part, so when two options are close, the one that unlocks more movements wins.
Value (25%)
We build a quality-adjusted picture of price. Set your number, then add 20%, because there’s a lot of cool gear out there and almost everyone spends a bit more than planned. Then sort your wishlist into essentials, nice-to-haves and ego buys, and check each one fits before it goes in the basket.
Find the attachment you need
J-cups | Spotter arms | Pin & pipe | Box tube | Straps | Plate storage | Bar storage | Cable / pulley | Dip station | Lever arms | Monolift | Landmine | Leg roller
Get RXd Builder J-Cups
Best Value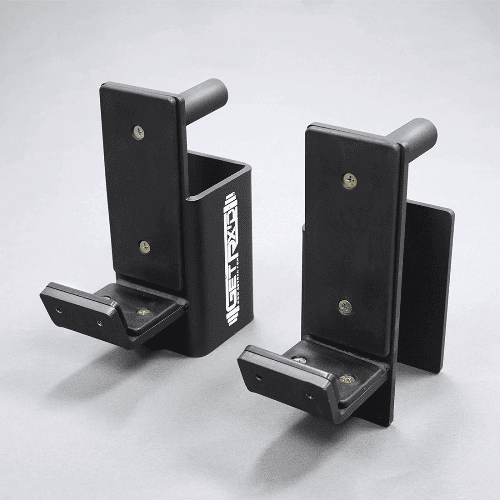
Quick specs
- Fixed UHMW-lined cup for 3x3 uprights, 1” hardware
- Built to the strength-rack standard
- Liner and welds matched to cups costing 2-3x more
- Fits most serious 3x3 racks
The cup that punches well above its tier: premium lining and welds at a price nothing else near it can touch.
Summary of experience, tests & opinions
What I like
- Racking is quieter and surer than stock cups. The deeper cradle and the lining mean the bar drops home without that metal-on-metal clack you get from a thin factory hook.
- On a knurled bar around 400 lb the UHMW can start to “stick” slightly on the re-rack. It’s the one moment a roller cup would feel slicker, and worth knowing before you load max singles.
What I don’t
- They’re 3x3, 1” only. On my 5/8” test rack they simply wouldn’t go on without the right pin, so a chunk of budget-rack owners are shut out.
Pros & cons
Pros
- UHMW-lined cradle that protects the bar’s knurling and finish.
- Welds and materials matched to cups two to three times the price.
- Built for the 3x3, 1” standard most serious racks use.
Cons
- No fit for 2x3 or 5/8” budget racks.
- Fixed plastic, so it can’t match a roller cup on a heavily knurled max bar.
Read more about the Get RXd Builder J-Cups
The Builder wins on one simple idea: premium-cup quality without the premium badge.
Here’s how it sits against the dearer hooks, because the J-cup market splits three ways above it:
- Sandwich cups add a second lined wall for maximum bar protection. Overkill for most.
- Roller cups (like the Ghost Roller) swap the static plastic for a spinning surface so the bar never sticks, the one real edge once you’re loading a knurled bar past about 400 lb.
- Stock cups below the Builder mean thinner steel, sloppier welds and a skimpier liner.
Who should buy it, and who should skip:
- Buy it if you bench or squat most sessions on a 3x3 rack and want real bar protection without paying up for a roller.
- Skip it if your stock cups are already well lined and you mostly do lighter accessory work. Plenty of factory J-cups are fine.
The most common slip-up here is hardware size, not profile. A 1” cup never drops onto a 5/8” rack, so confirm both your tube width and your hole size before you order. Different rack? Start with our best J-hooks for a squat rack guide, which covers the 5/8” options too.
Where the Builder lands against the premium cups on bar protection:
Bottom line
The Builder is the value play in J-cups: premium lining and welds, none of the premium price, as long as you run a 3x3 rack.
Get it if… you bench or squat regularly on a 3x3, 1” rack and want to stop your bar getting chewed.
Skip it if… you’re on a 5/8” or 2x3 budget rack, or you load knurled max singles and want a roller cup’s slick re-rack.
REP Spotter Arms (PR-4000 / PR-5000)
Best for Safety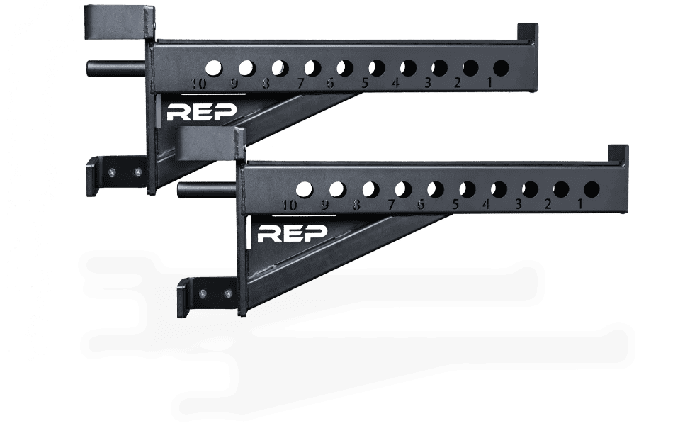
Quick specs
- Bolt-on front catch for REP PR-4000 / PR-5000
- Both 1” and 5/8” hardware versions
- Heavy gauge with a long catch surface
- Mounting holes accept pegs, pins or a roller
The cheapest way to add a real layer of safety to solo squats and presses, and they double as a second shelf for gear.
Summary of experience, tests & opinions
What I like
- The hidden trick is the mounting holes. I’ve run band pegs and a leg roller straight off the arms, which turns the front of the rack into a second working surface most sets never use.
- The long catch surface means you don’t have to be pinpoint on where you ditch a failed press. There’s room to bail and let go.
What I don’t
- “3x3 is 3x3” caught me out once. Two racks shared the profile but drilled holes on different centres, so the arm sat proud until I matched the spacing. Confirm centres, not just tube width.
Pros & cons
Pros
- Heavy gauge and a long catch surface, rated to take a dropped bar.
- Mounting holes turn them into a mount for pegs, pins or a roller.
- Sold in both 1” and 5/8” versions for REP’s PR-4000 and PR-5000.
Cons
- Built around REP’s 3x3 uprights, so fit on other brands rides on hole spacing.
- Budget alternatives are shorter, thinner, and not rated to hold accessories.
Read more about the REP Spotter Arms
Everyone who lifts alone needs a pair of these. Full stop.
They bolt to the front of the rack and catch the bar on a failed squat or press, they save your floor, and they help set bar height for different lifts. For a solo lifter that isn’t optional kit, it’s the baseline.
Where REP pulls ahead of cheaper sets:
- Build. A heavier gauge and longer catch surface than budget arms, which tend to be short and thin.
- The dual job. The mounting holes (that’s what they’re for) let pegs, pins or a roller live on the arms, so they earn space in front of the rack even on non-squat days.
On fit, the catch is spacing, not profile. They’re made for REP’s 3x3 PR-4000 and PR-5000 uprights in both hardware sizes, so match yours first. On another brand’s 3x3 rack they’ll often work if the hole pattern lines up, but two racks can share a profile and still drill their holes on different centres. That dual catch-plus-mount role is most of why they beat cheaper sets, which is worth weighing if you’re choosing between a pair of arms and a deeper in-cage safety.
How budget arms and the REP compare on the two things that matter most:
Bottom line
If you run a REP rack and train alone, these are close to essential: a proper catch that also doubles as a mount.
Get it if… you lift solo on a REP PR-4000 or PR-5000 and want one part that catches the bar and holds your accessories.
Skip it if… you’re on another brand and can’t confirm the hole spacing matches, or your rack already shipped with rated arms. Check the deeper backstop options under safety catches.
Safety catches
Safety catches sit inside the cage and are the deeper backstop behind your spotter arms. There are three types, and the right one depends on your rack’s depth and how you lift. Run a rigid or strap safety together with spotter arms and you’ve got the closest a home gym gets to a real spotter.
You probably want a dedicated safety if your rack’s depth poles (the stretchers) aren’t right at the top and bottom of the cage. If they are, like on my gym racks, the safeties won’t get in the way of your lifting at all.
Here’s how the three types compare on what actually matters:
| Safety type | Hard-bail protection | Kindness to bar | Full depth | Fit range |
|---|---|---|---|---|
| Box tube | Best | Partial | Partial | Brand-specific |
| Pin & pipe | Good | Partial | Good | Wide |
| Straps | Partial | Best | Best | Widest |
Which type suits which lifter:
- Pin and pipe if you want rigid protection on the cheap and don’t mind a slightly clattery catch.
- Box tube if hard-bail protection matters most, you squat heavy, and your cage is tall enough that a high-set tube won’t cut your depth.
- Straps if you want full range of motion and a bar that’s never battered, and you can live with them sagging over the years.
The fitment rule for all three: rigid safeties pass through two uprights, so the rack’s inside width matters as much as the upright profile and hole size. Straps are the most forgiving on length, which is why they fit the widest range of racks.
Titan T-3 Pin & Pipe Safety Set
Best Budget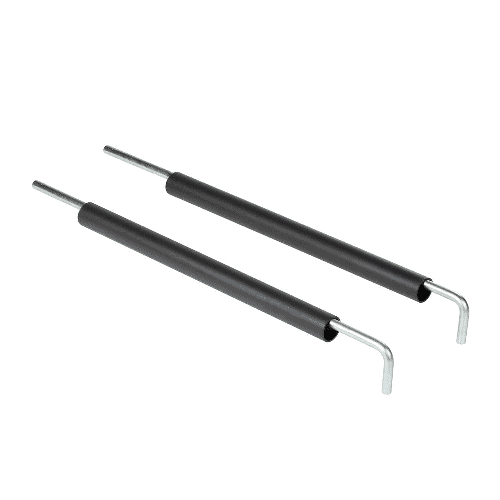
Quick specs
- Pin-and-pipe set for Titan 2x3 T-3 racks, 5/8” holes
- X-3 bolt-down version also available
- Hefty and well padded for the price
- Tolerates up to ~0.15” gap on a non-exact match
A genuine bargain: as hefty as the high-end sets and padded enough not to chew the bar. The budget pick of the three safeties.
Summary of experience, tests & opinions
What I like
- The padding is the surprise. For a budget set, a bailed bar lands with a muffled thud rather than the bare clang you brace for, so it doesn’t mark up the knurling.
- The pipe slides into the pin without a fight, which makes setting depth between lifts quick rather than a wrestle.
What I don’t
- Titan’s quality wanders across its range, so you’re buying the good item in a mixed catalogue rather than a guaranteed-great brand. This particular set is the good one.
Pros & cons
Pros
- As hefty as far dearer sets, with proper padding.
- Cheapest route to rigid in-cage protection.
- Sold for Titan 2x3 T-3 and as an X-3 bolt-down.
Cons
- Built around Titan racks, so cross-brand fit needs checking.
- Slightly clattery catch versus a box tube.
Read more about the Titan T-3 Pin & Pipe
Pin and pipe is the cheapest way to get rigid protection inside the cage, and this is the set we’d point a budget buyer at.
It’s built for Titan’s 2x3 T-3 racks with 5/8” holes, with an X-3 bolt-down version if that’s your frame. The fit is more forgiving than a box tube: pin pipes don’t need a perfect match, but they shouldn’t rattle loose either. Up to about a 0.15” gap is fine if you can’t get an exact size.
What you’re trading for the low price is the catch itself. A pin-and-pipe bail is rigid and safe, but it’s a touch clattery next to a box tube, and it doesn’t cradle the bar the way straps do. For most solo lifters that’s a non-issue, it’s a backstop, not a daily contact point.
Bottom line
The value safety. Rigid protection, proper padding, the lowest price of the three types.
Get it if… you want a cheap, rigid in-cage backstop on a Titan 2x3 or X-3 rack and don’t mind a clattery catch.
Skip it if… hard-bail protection on heavy squats is your priority. Step up to the box tube, or the straps if you want full depth.
Force USA MyRack Box-Tube Safeties
Best for Protection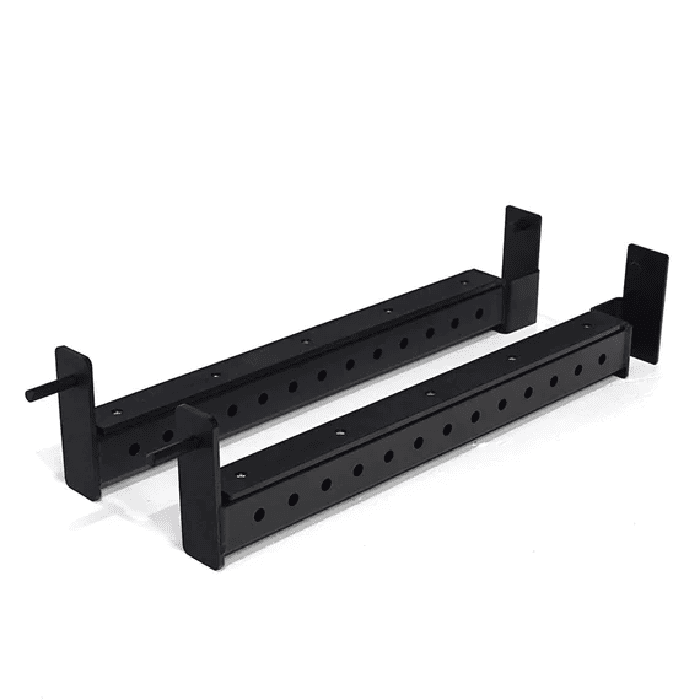
Quick specs
- Box-tube safeties sized for the Force USA MyRack
- Most hard-bail protection of any safety type
- Undercut the equivalent Titan tubes on price
- Through-upright length is the cross-brand catch
The most protection on a hard bail, at a price that undercuts the obvious rival. The pick if you squat heavy and want a true backstop.
Summary of experience, tests & opinions
What I like
- A bailed squat lands solid and stays put, none of the bounce or roll you get off straps. For a heavy single, that dead-stop catch is exactly the confidence you want.
- They feel like the most over-built safety in the cage, which is half the reason you stop thinking about the bail and just lift.
What I don’t
- A high-set tube ate into my depth on a shorter cage during testing. You have to measure the tube height against your own squat before you commit, especially in a low frame.
Pros & cons
Pros
- The best hard-bail protection of the three safety types.
- Undercuts the equivalent Titan tubes on price.
- Heavy, over-built feel under a dropped bar.
Cons
- A high-set tube can limit squat depth in a short cage.
- Sized for the MyRack, so cross-brand fit rides on through-upright length.
Read more about the Force USA MyRack Tubes
Box tubes give you the most protection on a hard bail, and these strike the cleanest balance of quality and price we’ve found.
The trade-off with any box tube is depth, not safety. Because the tube is a fixed height, a high setting can stop you hitting the bottom of a deep squat, so the one measurement that matters is tube height against your own rack and your own depth. That’s doubly true in a shorter cage.
They’re sized for the Force USA MyRack, so on another brand’s rack the thing to verify is the length through the uprights, the tube has to span the inside width and seat properly on both sides.
Bottom line
The protection pick. The most solid hard-bail catch here, for less than the obvious rival, as long as your cage is tall enough.
Get it if… you squat heavy, want a dead-stop catch, and have the cage height to set the tube low enough for full depth.
Skip it if… you’re in a short cage where a high tube would cut your squat, or you want gentler treatment of the bar. Look at straps.
PRx Build Limitless Strap System
Best for Full Depth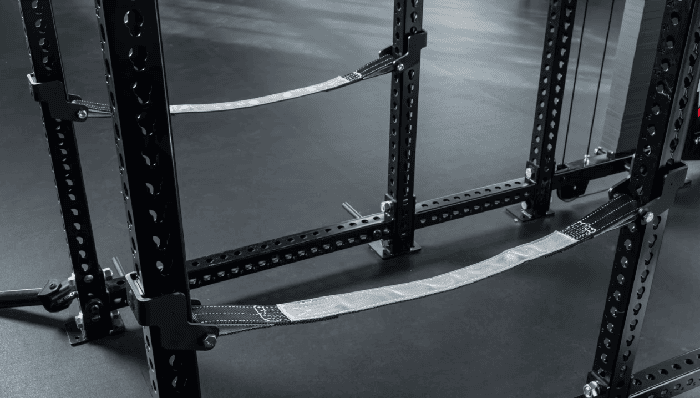
Quick specs
- Adjustable strap safeties, made by Spud Inc.
- Set the two ends at different heights
- Most forgiving on length of any safety
- Robustness only Rogue’s straps rival
The gentlest safety on the bar, with full range of motion. The pick if you want a backstop that never batters your barbell.
Summary of experience, tests & opinions
What I like
- Setting the two ends at different heights is the clever bit. A dropped bar rolls away from you down the slope instead of bouncing back, which feels safer than any rigid catch on a true grinder.
- The Spud Inc. webbing is the reassuring part. It’s the kind of strap you can load against hard without that “is this going to hold” thought.
What I don’t
- They sag. Over five to ten years the webbing stretches, so you re-tension every so often or the catch point creeps lower than you set it.
Pros & cons
Pros
- Gentle on the bar with full range of motion.
- Most forgiving on length, so they fit the widest range of racks.
- Spud Inc. build, with robustness only Rogue’s straps match.
Cons
- Don’t match a rigid safety on a hard drop.
- Stretch and sag over the years, needing re-tensioning.
Read more about the PRx Build Limitless Strap System
Straps live in the middle of the three safeties, and they’re the pick for one specific priority: protecting the bar while keeping full depth.
Why they suit some lifters better than any rigid catch:
- Full range of motion. The webbing sits low and out of the way, so nothing clips your depth the way a high box tube can.
- Kindness to the bar. A dropped bar settles into the strap instead of slamming steel, so the knurling and finish stay clean.
- Roll-away geometry. Set the ends at different heights and a bailed bar drifts away from you, not back onto you.
What you give up is hard-drop performance. On a genuine slam, a rigid safety stops the bar dead where a strap gives a little. For grinders and accessory work that’s a fair trade, for a max single you’re banking on never truly dumping it.
The PRx won a tight race on robustness: only Rogue’s straps rival them, and the Build Limitless set is made by Spud Inc., who know webbing. On fit, straps are the most forgiving thing here, the catch isn’t length, it’s having a cage deep enough to run them front to back, plus the discipline to re-tension as they age.
Our compatibility guide has the rest of the fitment detail across rack profiles.
Bottom line
The full-depth, bar-friendly safety. Set the ends at different heights and a bailed bar rolls away from you.
Get it if… you want full range of motion and a bar that never gets battered, and you’ll re-tension as the straps age.
Skip it if… you want a dead-stop catch on a heavy slam. The box tube or pin and pipe are rigid.
REP Weight Horns
Best for Stability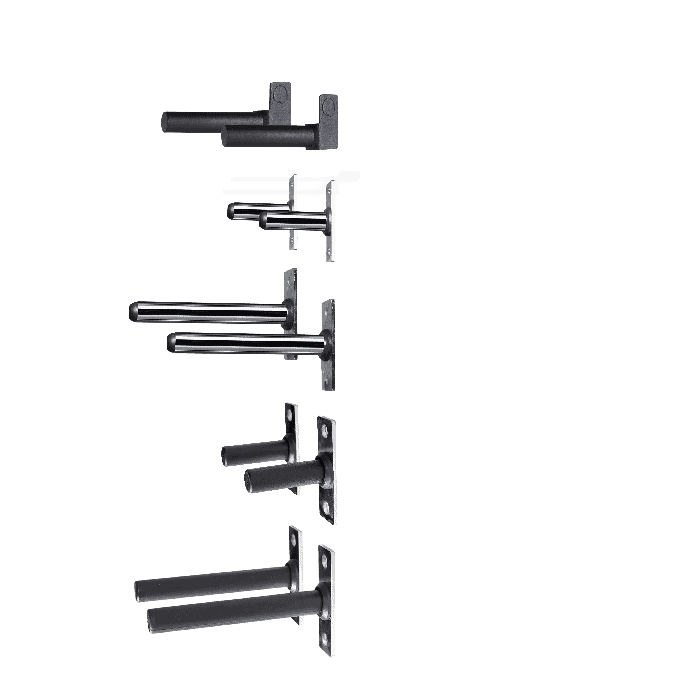
Quick specs
- Bolt-on plate posts in fits for most rack profiles
- 2x3 and 3x3, with the right hole size
- Several lengths and finishes
- Loaded horns add steadying mass low on the frame
Plate posts that get your weights off the floor and add steadying mass to the rack, undercutting Rogue’s horns on price.
Summary of experience, tests & opinions
What I like
- The side benefit nobody buys them for: a loaded set of horns plants mass low on the frame and quietens a rack that used to rattle on heavy reps.
- Loading and stripping plates next to where you lift, rather than off the floor, takes the small daily faff out of changing weight mid-session.
What I don’t
- A longer horn cantilevers further off the frame, so on a lighter rack I’d size down. Hang too much off a long horn on a flimsy upright and you feel it lean.
Pros & cons
Pros
- Fits for most common rack profiles and hole sizes.
- Several lengths and finishes to match the rack.
- Undercut Rogue’s horns on price.
Cons
- Long horns cantilever, so a lighter rack wants a shorter one.
- Bolt-on versus pin-style is easy to get wrong on order.
Read more about the REP Weight Horns
Weight horns bolt to the rack and hold your plates off the floor, close to where you load. They keep the space tidy and quick to use.
There’s a bonus most people don’t expect: a loaded set adds mass low on the frame, which steadies a rack prone to rattling. Once your plate pile has outgrown the floor, the horns stop being optional and pay for themselves in saved faff.
REP’s line is our pick for two reasons: it’s versatile across length, finish and rack fit, and it undercuts Rogue on price. On fit, watch these:
- Bolt-on versus pin-style. Some racks want a horn that bolts through a hole, others take a peg that slots in. Buy for how your uprights are drilled.
- Profile and hole size. They come in fits for most common profiles (2x3 or 3x3), so confirm yours before ordering.
- Length versus rack weight. A longer horn holds more but cantilevers further off the frame, so on a lighter rack a shorter horn keeps the load closer in.
Bottom line
The value plate storage: versatile fits, several lengths, cheaper than Rogue, and a steadying bonus when loaded.
Get it if… your plates have outgrown the floor and you want storage that also quietens a rattly rack.
Skip it if… you own one set of plates that lives on the bar. Tidy bar storage may matter more.
Rogue Vertical Bar Hanger
Best for Tidiness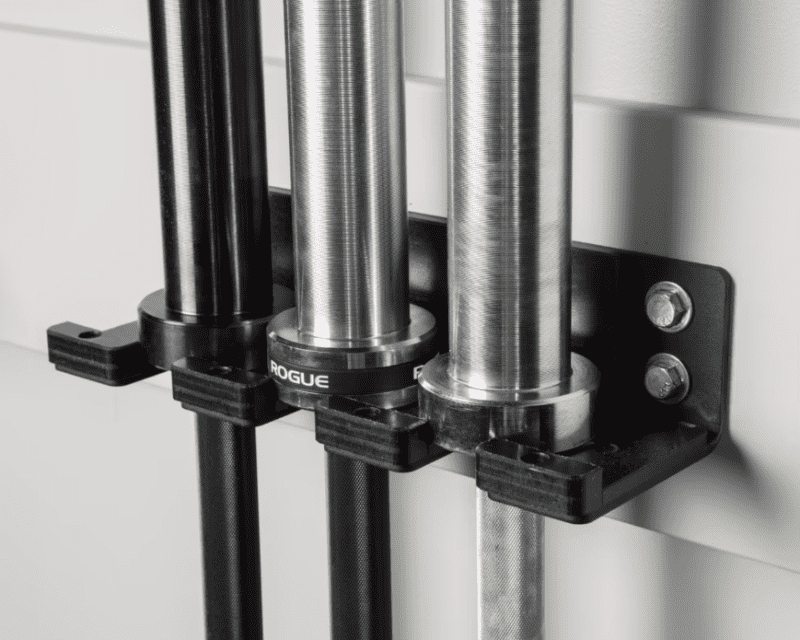
Quick specs
- Rack-mounted vertical holder for barbells
- Rogue build at an un-Rogue-like price
- Match hole size and spacing, not just profile
- Needs ceiling clearance above the mount
Stands your barbells up out of the way with Rogue build, for once at a price that isn’t very Rogue.
Summary of experience, tests & opinions
What I like
- It does the boring job perfectly: bars stand up, off the floor, out of the walkway. Once they’re not rolling around underfoot you wonder how you trained without it.
- Rogue’s finish on something this cheap is the pleasant surprise. It feels like a part that’ll still be on the rack a decade from now.
What I don’t
- I clipped a bar on the ceiling first install. A vertical hanger plus a bar on end is tall, so the clearance above the mount is the thing people forget to measure.
Pros & cons
Pros
- Rogue build at a price that isn’t very Rogue.
- Frees floor space and stops bars rolling around.
- Mounts to most racks with matching hole spacing.
Cons
- Needs real ceiling clearance above the mount point.
- Single-purpose, so skip it if you own one barbell.
Read more about the Rogue Vertical Bar Hanger
A vertical hanger mounts to the rack and stands your barbells up out of the way. It frees floor space and stops bars rolling around underfoot.
Once you own more than one bar, it pays for itself in tidiness alone. If you’ve only got the single barbell that lives in the J-cups, you can skip it without missing anything.
The Rogue is the pick because it delivers Rogue build at a price that, for once, doesn’t sting. Bar holders are a dime a dozen, so quality isn’t really the question, fit is. Three things to check before you order:
- Mount pattern. The real question is whether it bolts to your rack, so check the pattern against your uprights.
- Hole size and spacing. Match these, not just the tube profile. A hanger drilled for one brand can sit askew on another even at the same 3x3.
- Ceiling height. A vertical hanger plus a barbell on end is tall, so measure the clearance above the mount first.
Bottom line
The tidy-up buy. Rogue build at a fair price, as long as you’ve the headroom and more than one bar.
Get it if… you own a few barbells and want them stood up and out of the walkway.
Skip it if… you own one bar, or your ceiling is too low for a bar on end above the mount.
PRx Elite Pulley System
Best for Versatility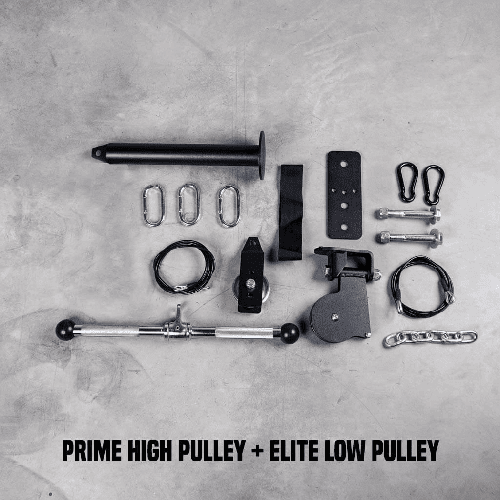
Quick specs
- Cable-based pulley, 1:1 ratio, 600 lb capacity, 72” cable
- Fits PRx Profile PRO and Build Limitless racks (5/8”+ holes for the low pulley)
- Mounts with the included post and rack locking system
- Add the low-pulley attachment for a top-and-bottom setup
Probably the cheapest attachment going per exercise added: it turns the rack into a cable machine for lat pulldowns, rows, curls and more.
Summary of experience, tests & opinions
What I like
- On a cost-per-exercise basis nothing else on this list comes close. One part covers pulldowns, triceps, curls and rows, which is a whole accessory day off a single attachment.
- With the low-pulley add-on you get both top and bottom positions off one system, so it covers more than you’d guess.
What I don’t
- It’s a manual cable system, so a full crossover still means a second pulley. It’s basic by design, and you feel that next to a dedicated cable column.
Pros & cons
Pros
- Adds a dozen-plus exercises off one part.
- Covers top and bottom positions with the low-pulley add-on.
- 1:1 ratio, 72” cable, 600 lb capacity.
Cons
- A full crossover still needs a second pulley.
- Rack-specific: built for PRx Profile PRO and Build Limitless racks.
Read more about the PRx Elite Pulley System
A pulley attachment turns the rack into a cable machine, and counted by cost per exercise added, it’s probably the best-value attachment here.
What it unlocks off one part:
- A top pulley gives you lat pulldowns and triceps work.
- A bottom pulley gives you curls and rows.
- A pair on the front uprights makes a full crossover.
If you don’t already own a cable machine or functional trainer, this adds the most per dollar of anything on the list. It’s basic, affordable, and covers both top and bottom positions once you add the low pulley. One fitment note: it’s built for PRx Profile PRO and Build Limitless racks, and mounts with the included post and locking system.
How it compares to the dearer route depends on the rack you own:
- The Elite Pulley is a manual cable system with a 1:1 ratio, so you’ll add the low-pulley attachment for bottom work. For accessory work around your barbell, that’s a fair trade for the price.
- A premium attachment-style cable setup refines that with smoother travel and less rethreading, at a real jump in price.
- Own a Monster rack? The Rogue Monster Slinger is about as close as an attachment gets to a real cable machine, and that’s its whole appeal. The catch is the fit: it’s unique to Rogue’s Monster and Monster Lite racks, so it’s a non-starter on anything else. If you’ve got one, pair the Slinger with a solo pulley and you’ve a serious cable setup. (Check the Monster Slinger here.)
Where the three options land on how close they get to a real cable machine:
Bottom line
The most exercise for the least money. A single pulley covers your accessory work; scale up if you want a true crossover.
Get it if… you want cable work around your barbell on any 5/8”-plus rack with a pull-up bar to anchor against.
Skip it if… you own a Monster rack and want the closest thing to a real cable machine, the Monster Slinger is built for that.
PRx Profile PRO Dip Station
Best for Stability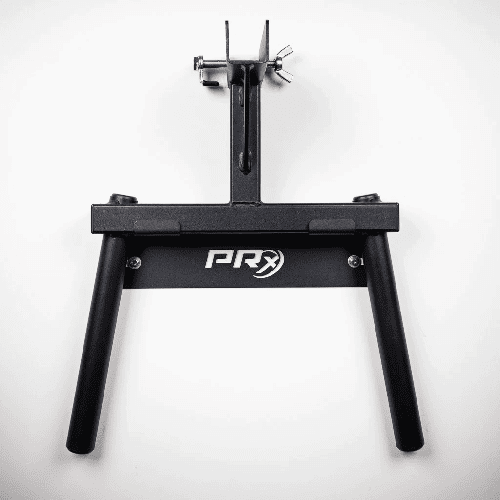
Quick specs
- Wide, stable rack-mounted dip station, US-made
- Smaller Profile ONE for tighter racks
- Bolts to two uprights, takes full bodyweight
- Doubles as a Roman chair with a little creativity
Zero rattle is the whole point of paying up on a dip, and this pair locks down with no play under load.
Summary of experience, tests & opinions
What I like
- The thing you feel on the first rep is the absence of feel: no shimmy, no creak as you press out of the bottom. On a dip, where a cheap unit wobbles you off balance, that dead-solid mount is the whole experience.
- With a little setup it becomes a Roman chair, which sneaks a second exercise out of one part.
What I don’t
- A station set for a wide cage can splay the handles too far for a smaller lifter. That’s the exact reason the narrower ONE exists, so pick by your frame, not just your rack.
Pros & cons
Pros
- Bolts rock-solid with no shimmy mid-set.
- US-made, with PRx’s finish and fit.
- PRO for stability, ONE for tighter racks and smaller lifters.
Cons
- Hangs off two uprights at full bodyweight, so the mount must clamp tight.
- Width can splay handles too wide for a small lifter on the PRO.
Read more about the PRx Profile PRO
A dip station mounts to the rack and lets you train dips without a standalone tower, and a bit of creativity turns it into a Roman chair too. Dips belong in most programmes, and not being able to crank out ten on day one is no reason to skip them.
The Profile PRO and its smaller sibling, the Profile ONE, are our picks. Both tick the quality boxes (finish, fit, storage) and excel at the thing that matters most on a dip: zero rattle. They’re US-made, which is a nice bonus. How to choose between them:
- Profile PRO is the wider, more stable of the two. Pick it if you’re a bigger lifter or want the steadier base.
- Profile ONE suits tighter racks and smaller lifters, and tucks in where space is short. (Check the Profile ONE here.)
- Both bolt rock-solid with no shimmy mid-set, which is the whole point of paying up on a dip.
Compatibility is the catch to watch. A dip station hangs off two uprights and takes your full bodyweight, so the mount has to clamp tight, confirm the profile and hole size match before ordering. Width matters as much as fit, which is exactly why the ONE exists.
A cheaper dip bar does the same movement, but rattle is the giveaway: a budget unit creaks and shifts the moment you press out of the bottom, where the PRx pair stay dead still under load.
How the two PRx options and a budget dip bar compare on stability:
Bottom line
The no-rattle dip. The PRO for a bigger lifter or a wide cage, the ONE for tighter racks.
Get it if… you want a dip that stays dead solid under load and bolts tight to two uprights.
Skip it if… you’re a smaller lifter or short on space, in which case the narrower Profile ONE is the better PRx of the two.
Bells of Steel Adjustable Lever Arms
Best for Variety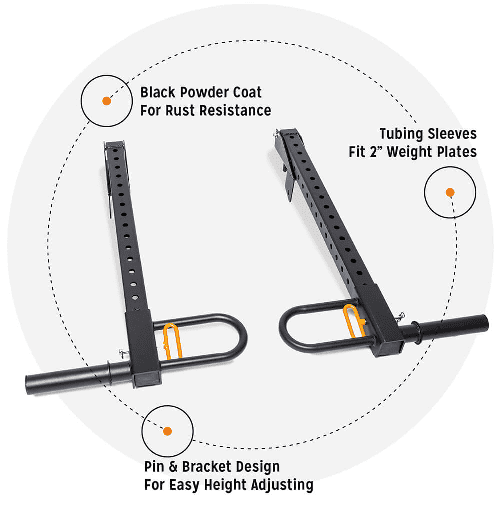
Quick specs
- Hinged resistance arms, no extra footprint
- Built for 2.3x2.3” (60mm) uprights
- A fraction of the cost of a single machine
- Sold for less than Titan, REP or Rogue
One of the most underrated attachments going: machine-like resistance, no extra floor space, a fraction of a machine’s price.
Summary of experience, tests & opinions
What I like
- They’ve kept me training through a cranky shoulder more than once. The fixed hinge takes the wobble out of pressing, so you can load a niggly joint along a path it tolerates.
- The arc on a bent-over row actually feels better than free weight, which is the kind of thing you only notice a few sessions in.
What I don’t
- The 60mm fit is the trap. On my 3” test rack a pair simply wouldn’t mount, no shimming round it, so this is the one attachment to measure twice before ordering.
Pros & cons
Pros
- Crazily versatile: a wall of machine paths in one part.
- No extra footprint, mounts on the rack.
- Cheaper than Titan, REP or Rogue.
Cons
- Built for 2.3x2.3” (60mm), so a 3” profile often won’t take them.
- Upright-size mismatch is the gotcha, more than hole spacing.
Read more about the Bells of Steel Adjustable Lever Arms
Lever arms replace a wall of fixed machines by adding hinged resistance to the rack. Along with cable pulleys, I’d call them the most underrated attachment going: versatile, no extra footprint, and a decent pair costs a fraction of a single machine.
What they’re genuinely good for:
- Mixing up stale training with a hinged, machine-like resistance path.
- Lifts where the arc actually feels better, like bent-over rows.
- Training around a niggle, such as benching with a cranky shoulder, where the fixed path takes the wobble out.
Bells of Steel make a solid pair and sell them for less than Titan, never mind REP or Rogue. The one catch is fit, and it’s a real one. They’re built for 2.3x2.3” racks, so a 3” profile is the most common reason a pair won’t go on, that upright-size mismatch is the gotcha here far more than hole spacing.
Cheaper jammer-style arms exist, but they often demand a stack of adapters and trolleys to work properly. That’s where the Bells set earns its keep, by mounting cleanly on the rack it’s made for, no kit of shims required.
Bottom line
The variety buy. A wall of machine paths in one part, for a fraction of a machine, if your uprights are 60mm.
Get it if… you run a 2.3x2.3” rack and want machine-like variety without the floor space or the cost.
Skip it if… you’re on a 3” profile. They likely won’t mount, and shimming a load-bearing arm isn’t worth the risk.
Titan T-3 Adjustable Monolift
Best for Solo Benching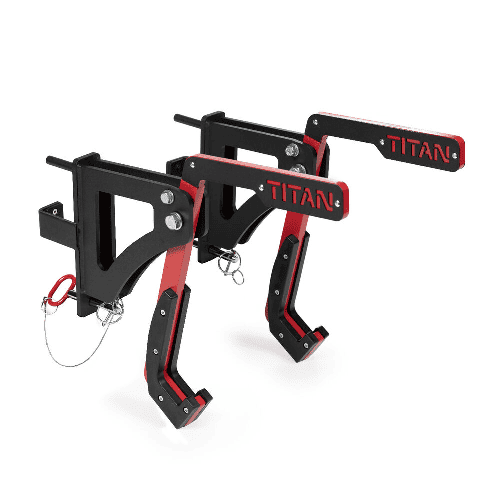
Quick specs
- Swing-away monolift arm, built for Titan 2x3 T-3, 5/8”
- Removes the reach-back on a heavy bench
- Shortens or removes the squat walk-out
- Expect minor mods on a non-Titan rack
The closest thing to a human spotter you can bolt to a rack, and the best value of the monolifts.
Summary of experience, tests & opinions
What I like
- The first heavy solo bench with one of these is a revelation. You press straight up off the arm instead of reaching back to unrack, which is the moment most lone benchers feel least safe.
- Once it’s on the rack you stop thinking about the unrack at all, and that calm is worth more than it sounds on a max single.
What I don’t
- Titan’s tolerances run slightly off on purpose. On a non-Titan rack the pin diameter or spacing needed a little fettling to seat, so plan for that rather than expecting a drop-on fit.
Pros & cons
Pros
- Takes the injury-risk reach-back off a heavy solo bench.
- Shortens or removes the squat walk-out.
- Best value of the monolifts.
Cons
- Titan’s deliberately loose tolerances mean mods on other racks.
- A quality-of-life part, not a basic, and not cheap.
Read more about the Titan T-3 Adjustable Monolift
A monolift arm is the closest thing to a human spotter you can bolt to a rack. It lets you start a press straight up before swinging out of the way, shortens or removes the walk-out on squats, and gives you more racking room and confidence than a J-cup.
The big one is that first point. Reaching back to unrack a heavy bench is a real injury risk, more than most lifters admit, and a monolift takes it off the table. If you bench heavy on your own, it’s the kind of part you can’t imagine training without once it’s on the rack. Who should buy, and who shouldn’t:
- Buy it if you bench or squat heavy as a solo lifter and the walk-out or reach-back is where you feel least safe.
- Skip it if you train light, lift with a partner, or your stock J-cups already feel fine. It’s a quality-of-life part, not a basic.
These aren’t cheap, but they earn it. The T-3 adjustable arm is the best value, built for Titan’s 2x3 T-3 rack with 5/8” holes. The thing to plan for is Titan’s tolerances, which run slightly off on purpose. On a Titan T-3 it drops straight on; on another brand’s 2x3 the pin diameter or spacing is what trips people up, so factor in a little fettling. Premium monolifts run tighter tolerances and add roller cups, but for solo benching the T-3’s swing-away function is what matters, and it nails that.
Bottom line
The solo-bencher’s safety net. It removes the reach-back, and the T-3 is the best value of the type, with a little fettling expected off-brand.
Get it if… you bench or squat heavy alone on a Titan T-3 and want to kill the unrack reach-back.
Skip it if… you lift with a partner or train light, or you can’t accept minor mods on a non-Titan rack.
Rogue Landmines
Best for Movement Range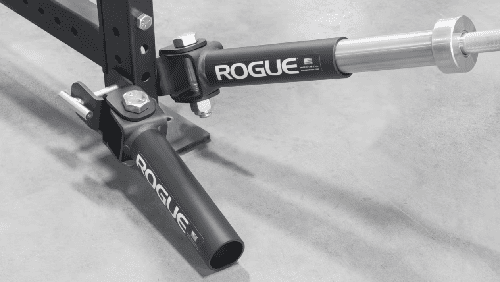
Quick specs
- Anchors a barbell sleeve to rotate the other end
- Takes a standard Olympic sleeve
- Rack-mounted or floor-standing versions
- Best-made of the type, and not expensive
Opens up presses, rows, rotations and squats off a single barbell. In a space-limited home gym, genuinely transformative.
Summary of experience, tests & opinions
What I like
- The pivot is smooth and the finish is pure Rogue, so it feels like a proper piece of kit rather than a tube with a hole. For a part this simple, that character is a nice-to-have.
- It’s the attachment that does the most to stretch one barbell, in a small gym that’s the whole game.
What I don’t
- Honest answer: a landmine is so simple that the Rogue’s quality barely changes what it does. Something basic anchors and pivots a bar just as well, so you’re paying for finish, not function.
Pros & cons
Pros
- Unlocks presses, rows, rotations and squats off one bar.
- Takes a standard Olympic sleeve, so fit is easy.
- Best-made of the type, and not expensive.
Cons
- A simple part, so a budget unit does the same job.
- Rack-mounted versions still need the right hole size.
Read more about the Rogue Landmines
A landmine anchors one end of a barbell and lets the other rotate, the brainchild of Bert Sorin of Sorinex. Off a single bar it opens up a lot:
- Unilateral presses and rows
- Rotations and explosive work
- Squats and ab training
In a commercial gym it’s useful. In a home gym, where floor space is the constraint, it’s genuinely transformative for how much you can do with one barbell. Fitment is the easy bit for once:
- It takes a standard Olympic barbell sleeve, so the main thing to match is your bar’s sleeve diameter, not a rack profile.
- A rack-mounted landmine bolts to the uprights and needs the right hole size; a floor-standing one just needs the space. Decide which mount you want first.
Rogue’s are the best made, thanks to the finish, the detail and that bit of Rogue character. They’re not expensive, so price barely enters it. That said, a landmine is such a simple part, just an anchor and a pivot, that something cheap like the Yes4All swivel T-bar does the same job. This is exactly the kind of secondary attachment where the budget option is no real compromise, so buy the Rogue for the finish or the cheap one for the function, both work.
Bottom line
The most exercises off one bar, in the least space. Buy the Rogue for the finish, or a budget swivel if function is all you want.
Get it if… you’ve one barbell and want to wring presses, rows, rotations and squats out of it.
Skip the premium if… you only care about function. A simple swivel anchor does the same job for less.
Rogue Monster Lite Leg Roller
Best for Leg Work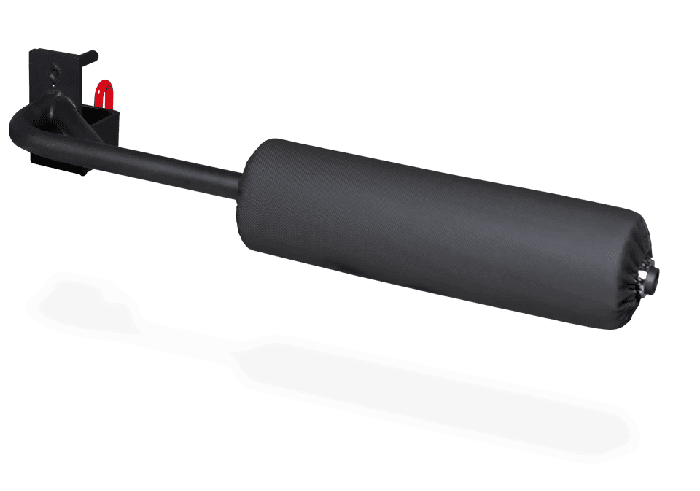
Quick specs
- Rack-mounted leg roller for Rogue Monster Lite (3x3, 5/8”)
- Pins the legs for lunges, Nordic curls, split squats
- Least rattle of the leg rollers we’ve tested
- Mount must be snug to handle sideways load
The leg roller with the least rattle by a clear margin, for the lifter who pins their legs often and wants it solid.
Summary of experience, tests & opinions
What I like
- You pull sideways against a leg roller, and this one just doesn’t budge. The snug mount kills the rattle that makes cheaper rollers feel sketchy on a hard Nordic.
- It’s secure enough that you stop babying the movement and actually load it, which is the only reason to buy a dedicated roller over using a bench.
What I don’t
- It’s Monster Lite specific, so a big chunk of rack owners can’t run it. Check your profile is 3x3, 5/8” before anything else.
Pros & cons
Pros
- Least rattle of the leg rollers we’ve tested.
- Snug mount handles the sideways load well.
- Rogue build and finish.
Cons
- Built for Rogue Monster Lite (3x3, 5/8”) only.
- Not essential, a bench covers a lot of the same ground.
Read more about the Rogue Monster Lite Leg Roller
A leg roller mounts to the rack and pins your legs for movements like lunges, Nordic curls and split squats.
It isn’t essential. A bench covers a lot of the same ground, so this is one for people who do that kind of work often and want it pinned down more securely. If that’s you, Rogue’s roller has the least rattle by a clear margin. Two things to match before ordering:
- The Monster Lite version is built for Rogue’s Monster Lite (3x3, 5/8”) uprights, so check your profile.
- A leg roller takes sideways load when you pull against it, so the mount needs to be snug. A loose fit here is what causes the rattle the cheaper ones are known for.
If you own a Rogue rack, there’s a better answer than a dedicated roller: the Rogue Multi-Use Rack Roller. It’s a circular roller pad that replaces a dual leg-roller setup and a hip-thrust pad in one part, and it doubles as a centre-mount anchor for lat pulldowns. Our team rates it highly. The catch is that it’s Rogue-rack-only, so it’s an upgrade for that crowd rather than the category default, more on it in the also-rans below.
Bottom line
The leg roller for people who actually use one: solid, low-rattle, Monster Lite only.
Get it if… you load lunges, Nordics and split squats often on a Rogue Monster Lite rack and want them pinned solid.
Skip it if… you do this work rarely (a bench will do), or you own a Rogue rack and want the do-it-all Multi-Use Rack Roller instead.
Other attachments worth knowing
These add less to the average gym, but one of them might be exactly what your space needs.
- Rogue Multi-Use Rack Roller. A circular roller pad that folds a dual leg-roller setup and a hip-thrust pad into one part, and doubles as a centre-mount anchor for lat pulldowns. Our team rates it highly. It’s Rogue-rack-only, so it’s an upgrade for that crowd rather than a category default.
- Pull-up bar upgrades (multi-grip, sphere grips) make pulling more interesting, but they’re tightly tied to your specific rack and rarely swap between brands. Use the compatibility guide to find one that bolts to yours.
- Band pegs and extra pins are so versatile they’re nearly essential. We left them off the main list only because their use is obvious.
- Belt-squat attachment is a brilliant way to squat around a bad back, but the appeal isn’t broad enough, and the price too high, to crown a single best.
- Step-up platform earns its keep for glute work, though for most spaces a box or platform you already own does the same thing.
- Wall-ball target, cannonball grips, conversion kits all have their people: climbers and grip fanatics for the grips, stand-to-half-rack upgraders for the kits. None are everyday buys.
The bottom line
Comparing these attachments head to head is apples to oranges, so there’s no single trophy here, just the best part in each slot. Get the order right and the rest takes care of itself.
- Safety first. Spotter arms plus an in-cage safety if your rack didn’t ship with them.
- Then training range. A dip station, a pulley system and a landmine each unlock a whole block of exercises for little money or floor space.
- Then the day-to-day. Plate and bar storage, and an upgrade to your J-cups.
- Then the luxuries. Lever arms and a monolift, once the basics are sorted.
Set a budget, add 20%, and check every part fits your rack profile before it goes in the basket. Do that and you’ll spend on the gear you’ll actually use.
If you need a refresher on any pick, skip back to the category table.
Power rack attachment FAQs
What are the most useful power rack attachments to buy first?
Start with safety. A pair of spotter arms and a rigid safety (pin and pipe, box tube, or straps) are the first things to add if your rack didn’t ship with them, because they’re what let you train hard alone. After that, the attachments that earn their keep fastest are a dip station, a cable or pulley system, and a landmine. Each one adds a whole block of exercises for far less than the standalone machine would cost. Storage and upgraded J-cups come next. Lever arms and a monolift are quality-of-life buys once the basics are covered.
Will attachments from one brand fit a rack from another?
Often, but not always. Three things have to line up: the upright profile (2x3 or 3x3 inches), the hardware size (5/8 inch or 1 inch holes), and the hole spacing or pattern. Match those and a Rogue attachment can sit happily on a REP rack, or a Titan part on a Force USA cage. Get any of them wrong and it either won’t mount or it’ll rattle. Rigid safeties are the fussiest because they pass through two uprights, so the rack’s inside width matters too. Our compatibility guide lets you filter by your exact rack profile.
Do I really need both spotter arms and a separate safety?
Not strictly, but running both is the safest setup and the one we recommend for solo lifters. Spotter arms are your everyday catch and double as a mounting point for other gear. A rigid safety or strap set sitting lower in the cage is the deeper backstop that lets you bail with full range of motion. Spotter arms catch the normal misses, the in-cage safety catches the bad ones. It costs more, but it’s the closest a home setup gets to having a spotter on hand.
Can a power rack replace a cable machine?
For most home gyms, yes. A pulley or cable attachment turns the rack into a passable cable station: lat pulldowns and triceps work from a top pulley, curls and rows from a bottom pulley, and a full crossover if you mount two. It won’t feel identical to a commercial dual-stack machine, and you’ll do some swapping between positions, but for accessory training it covers the gaps around your barbell work for a fraction of the price and floor space of a separate machine.
Are expensive attachments worth it over budget ones?
It depends on the attachment. On the gear you use every session and load heavily, J-cups, safeties, a dip station, the build quality is worth paying up for, because rattle, scuffed bars and flex get old fast. On simple parts like a landmine, where the job is just to anchor and pivot a barbell, a budget unit does the same work as a premium one. Our rule is to spend on your priority attachments, save on the secondary ones, and put versatility ahead of badge.
